


Introduction
Since I started the #100DaysOfCode challenge a week ago, I challenged myself to write a blog article once every week to share my learnings and strengthen my knowledge.
For this weeks' episode, I decided to write an article about linear data structures and their suitability. I struggled a long time against learning this stuff because I didn't find it "seggsy". And to make it clear: I still don't.
But then again, it kind of makes sense to learn the technical stuff that makes things work behind the scenes.
What are linear data structures?
Maybe some of you have been thinking the same as me: "What does linear even stand for? And, if there are 'linear structures' - are there also 'non-linear structure?'"
Well, kind of - but that's a topic for another article.
Data in linear data structures are arranged in a single manner - which means each element is connected to its previous and next element. As you can imagine, those structures are easy to implement since a computer's memory is also sequential.
In the following, I will present gimmickry, which I coded while learning this stuff. It uses the structures #LinkedList, #Stack, and #Queue.
Since I use Codecademy as a learning resource, I coded those structures and added a little frontend so that the user can see what's happening on every operation.
You can take the code and use it to get the hang of it interactively, or you can follow along with reading.
What's a Node, and what do we need it for?
A node is the fundamental building block of many other data structures. Imagine them as containers, which hold two distinct pieces of information: a certain value or data in general and a link to another node.
It's also notable that nodes can hold numbers and every other data type like an array, strings or null.
When I first learned this stuff, I was pretty amazed that it does not take much to build a data structure. Sure, it may not be that complicated, but you can put many things into the design if you abstract a little bit.
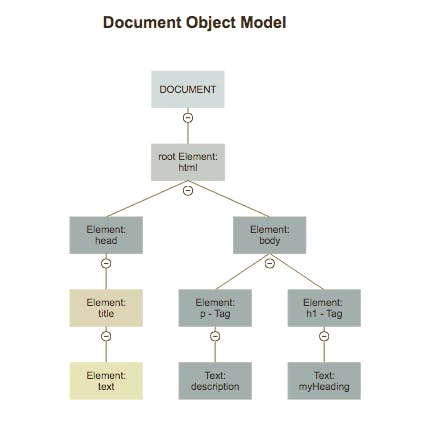
Since I am learning Web Development, I wanted to get the hang of where this node concept is applied on the WWW. Because nodes are the building blocks of many structures, I wasn't fully aware of it. Still, the Document Object Model representation as a tree holds nodes representing the different elements of a website.
Now that we have a decent number of nodes let's look at how they help us build the simplest data structure - a single linked list.
Single Linked List - and what you can do with them
Remember how I said it's simple to think of real-world examples to understand better the data structures I am talking about? Well, for the single linked List, you could think of a simple playlist.
Each Node represents a song, and a link to the next song that will start after the first one has ended (yeah, you could only play one song after another and would not be able to go back in your playlist, but let's not worry about it for the moment).

If you build the structure of this simple List, you also need a few operations to alter it. A straightforward operation would be to add another node to the List. However, you can also delete nodes from the List, which means that a link to the Node you want to delete is destroyed, and you cannot reference it anymore.
How to build this structure within JS
You could use an array to implement the structure. However, I chose to build it with Javascript Classes (to better understand this keyword and how to use methods).
There are a few different steps you need to make to build a fully functional Linked List.
- Create a Node Class (with data & and a link to the next Node)
- create setNextNode method to have a link to another node
- create setNext method to set data of next Node
- create getNextNode method to get info about the next Node in Linked List
- Create a Linked List Class
- The Linked List Class then uses the defined methods of the Node Class
I am grateful for having such a great learning resource like #Codecademy. Not only that I get to know all those information, but Codecademy also has lots of challenges where I have to code myself.
Firstly I created the Node Class to have my building blocks for the Linked List ready.
class Node {
    constructor(data) {
        this.data = data;
        this.next = null;
    }

    setNextNode(node) {
        if (!(node instanceof Node)) {
            throw new Error('Next node must be a member of the Node class');
        }
        this.next = node;
    }

    setNextData(data) {
        this.next = data;
    }

    getNextNode() {
        return this.next;
    }
}

module.exports = Node;
Let's take a closer look at what happens in the code. I assume you have basic knowledge of Javascript classes. If you want to dive into Classes again to refresh your knowledge, I suggest reading Understanding Classes in Javascript.
Like I stated above, every Node has two specific information: the data it holds and a link to the next Node.
That's precisely what the constructor does. It creates a Node with a parameter of data and a pointer to the next Node that is' null' at the time of construction.
The following two methods are also necessary. That's because we don't want a static list that's created once. The two methods setNextNode and setNextData provide comfortable functionality that enables us to set the following Node and the corresponding data.
Last but not least, there is a method that returns the following Node. We need those methods and a few others to build a fully functional Linked List. So, that you can delete Nodes from the head or the tail and also add new ones.
Adding new Nodes to the List
There are two ways to add Nodes to a single linked list. You can add them at the tail or at the head of the List.
Either way, you have to update the existing List accordingly. When you add a node to the head, it becomes the new head and the former head becomes the next Node.
Before we can add Nodes to a list, we have to create one.
class LinkedList {
    constructor() {
        this.head = null;
    }
The following methods are a little bit more complicated, but bear with me. I will explain everything step-by-step so you can follow along.
Adding a new Node to the head
Once we created the linked List, we need a method for adding nodes with data.
addToHead(data) {
    const nextNode = new Node(data);
    const currentHead = this.head;
    this.head = nextNode;
    if (currentHead) {
        this.head.setNextNode(currentHead);
    }
}
It creates a new Node with given data. After checking if the List is not empty, it sets the pointer of the following Node to the former head Node.
Adding a new Node to the tail
For this method, we have to traverse the List until we reach the last element. Once the algorithm has found it, adding a Node works the same as adding one to the head.
addToTail(data) {
    let lastNode = this.head;
    if (!lastNode) {
        this.head = new Node(data);
    } else {
        let temp = this.head;
        while (temp.getNextNode() !== null) {
            temp = temp.getNextNode();
        }
        temp.setNextNode(new Node(data));
    }
}
In this code snippet, a bunch of things happens. Firstly, a lastNode variable representing the last Node in the List is declared and initialised with the current head node.
Since we do not know if there actually is a head (a.k.a lastNode != null) we check if lastNode is falsy.
If it is, a new Node Instance is created and saved to the head of the Linked List.
If there is a head node, we start searching for the last Node in the list. The condition while (temp.getNextNode() !== null) checks if there is a next node. The result is saved inside of the variable temp.
Once the algorithm reached the end of the list, a new Node is added to it.
Removing a Node from the head
Puh - up to this point, it was quite a mouthful. But, bear with me - we just need one more method, and we built ourselves a fully functional Linked List!
removeHead() {
    const removedHead = this.head;
    if (!removedHead) {
        return;
    }
    this.head = removedHead.getNextNode();
    return removedHead.data;
}
It's to note that you cannot actually 'delete' a Node in the Linked List. You just delete the reference to it and free the memory which was allocated for it.
What can we do with Linked Lists and Nodes?
Maybe you ask yourself: "That's nice...but what do I use it for?"
Since I want to try presenting the major linear data structures to you, one is missing. I am talking about the Queue.
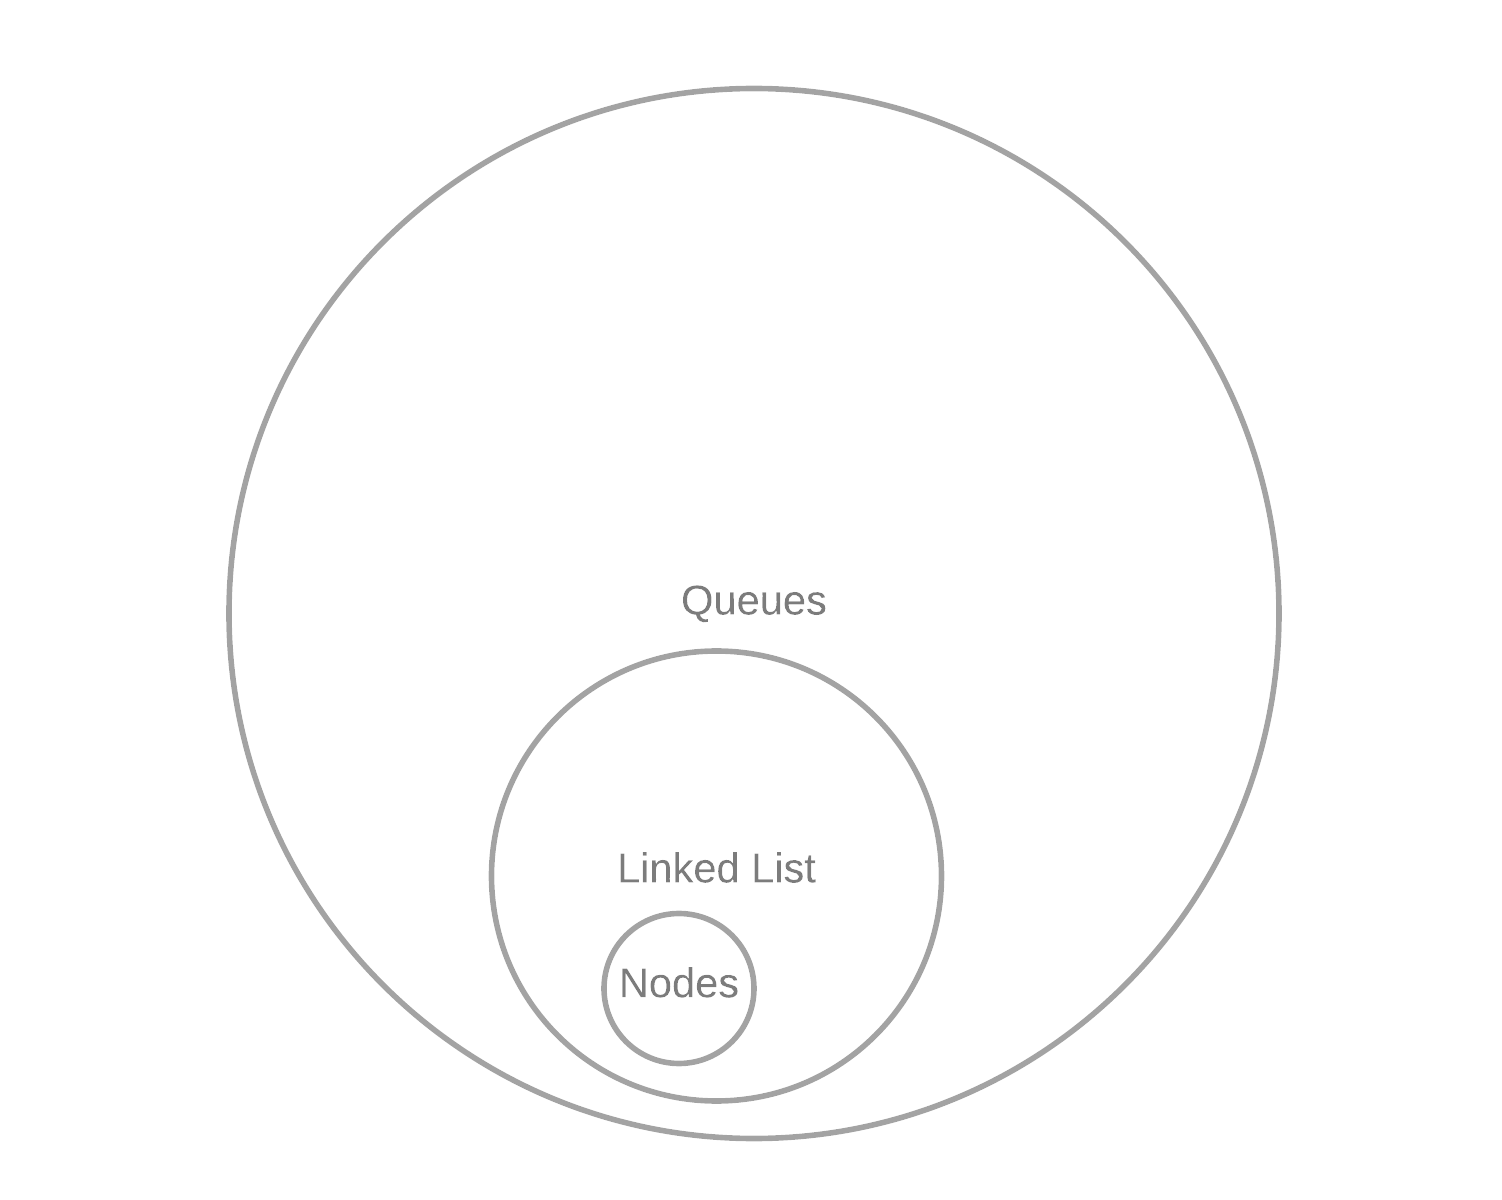
You can imagine Nodes and Linked Lists being a subset of Queues.
What's a Queue, and how is it different?
A Queue is another linear data structure that helps to manage data efficiently. Really, a queue in programming is not much different from a queue in real life.
You almost certainly have been standing in line when you were shopping for groceries. The difference to a stack that I will also talk about lies in accessing its elements.
A Queue uses the so-called First in first out schema. You stand in line, and people enter the queue after you. But no matter what, you will exit the queue before the people after you.
A stack pops elements following the concept First in last out. The following illustration makes it clear, I guess.

To build a queue with a Linked List as the underlying data structure, we need to import our Linked List Class.
const LinkedList = require('./LinkedList');
After that, we can call the constructor.
class Queue {
    constructor(maxSize = Infinity) {
        this.queue = new LinkedList();
        this.maxSize = maxSize;
        this.size = 0;
    }
}
If you want to refresh your knowledge about the this keyword, I suggest watching this short video of CodeWithMosh.
We basically build a queue with the help of our Linked List. Also, there is another handy trick that I learned while coding this data structure. With ES6, you can set default values to parameters you pass into functions. Pretty handy.
Now that there can be a fixed length, we need to know if there is still space left before adding new elements to the queue.
    isEmpty() {
        return this.size === 0;
    }
    hasRoom() {
        return this.size < this.maxSize;
    }
Both methods return true if the queue is empty or there is still room left inside the data structure.
How to enqueue and dequeue elements?
You remember the two methods addToTail() and removeHead() from above?
We can just use them to add or remove elements to the queue.
    enqueue(data) {
        if (this.hasRoom()) {
            this.queue.addToTail(data);
            this.size++;
            console.log(
                `Added ${data} to queue! Queue size is now ${this.size}.`
            );
        } else {
            throw 'Queue is full!';
        }
    }
First, we check if the queue can hold another element. If so, we add one and also increase the size.
    dequeue() {
        if (!this.isEmpty()) {
            const data = this.queue.removeHead();
            this.size--;
            console.log(
                `Removed ${data} from queue! Queue size is now ${this.size}.`
            );
            return data;
        } else {
            throw new Error('Queue is empty!');
        }
    }
For dequeuing, we check if the queue is empty. If it's not, we remove the first element from its head and decrease the size by one.
Conclusion
Phew..that was a lot to grasp. I will not add how to build a stack since it's pretty similar to building a queue. The only difference is using a method that adds to the head and pops values from its head.
If you have anything to add, feel free to comment and share your thoughts with me. Would love to hear your opinion!
Happy coding.